Home > Help > View

View
Find out more about display options in the system and the meaning of the icons on the assets.
View options
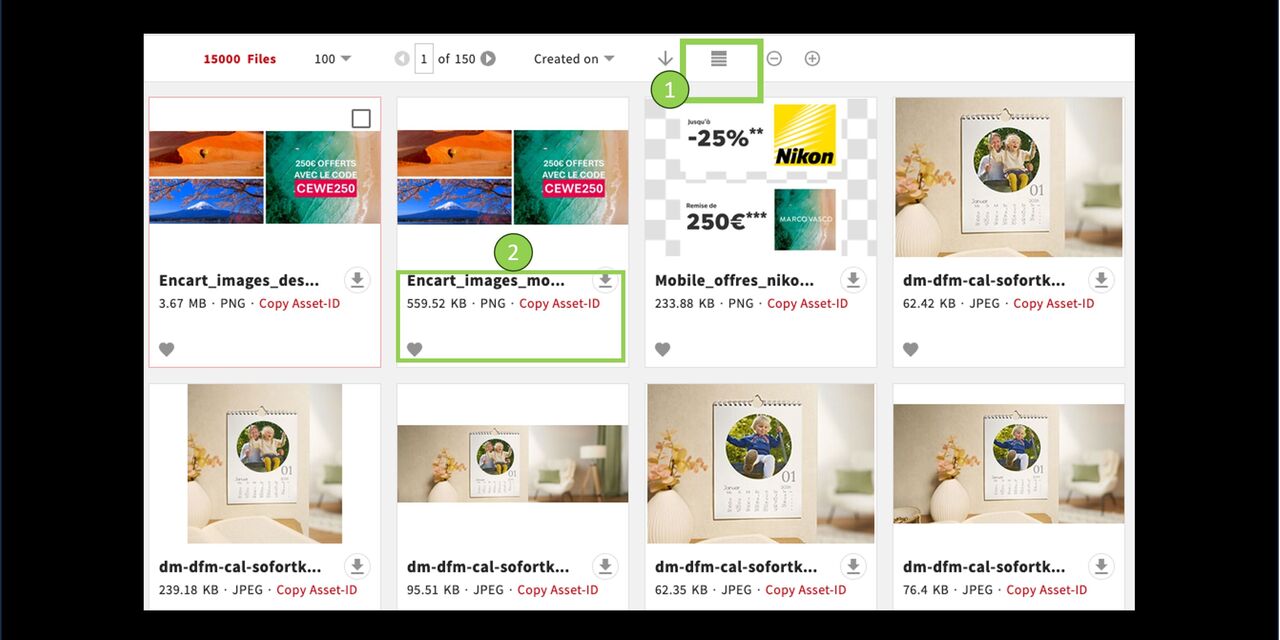
Tiles
The tile view is the standard option in CEWE MediaAssets.
You see a thumbnail of the assets including file name, size, format and possibly more informative icons.
You can switch between different options using this symbol
Asset-view within tile view
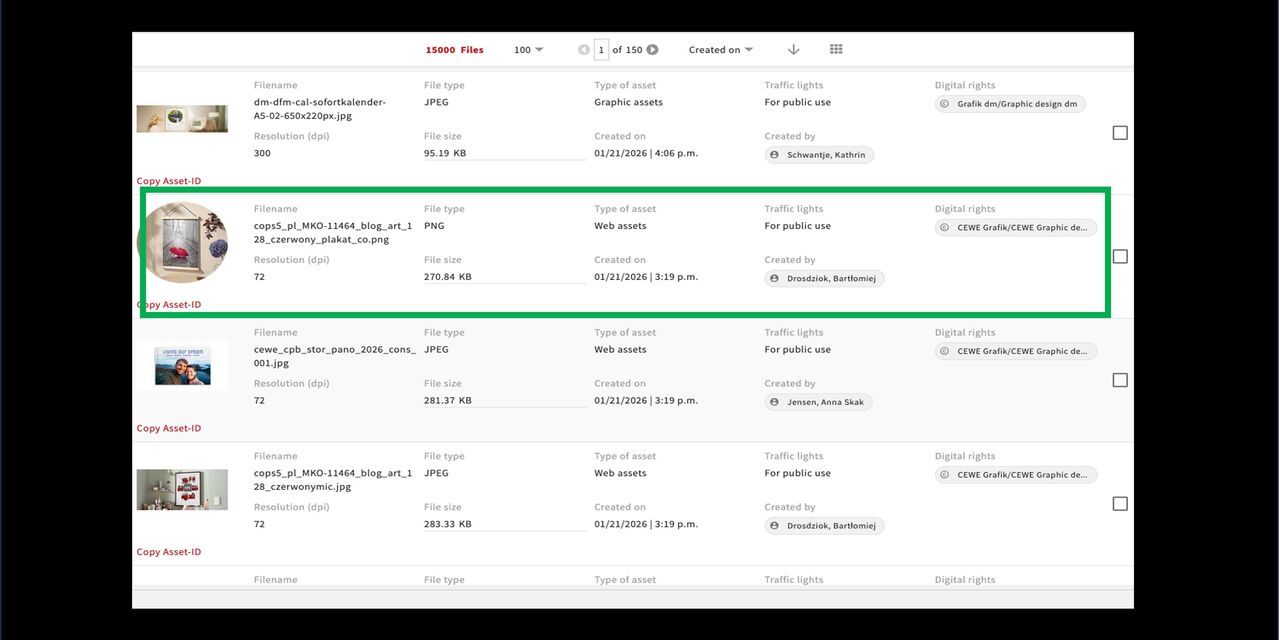
Grid
The grid view is one way to display assets along with additional metadata.
The image and file name are shown in a smaller size.
Additional metadata is displayed in detail, such as file type, image rights, etc.
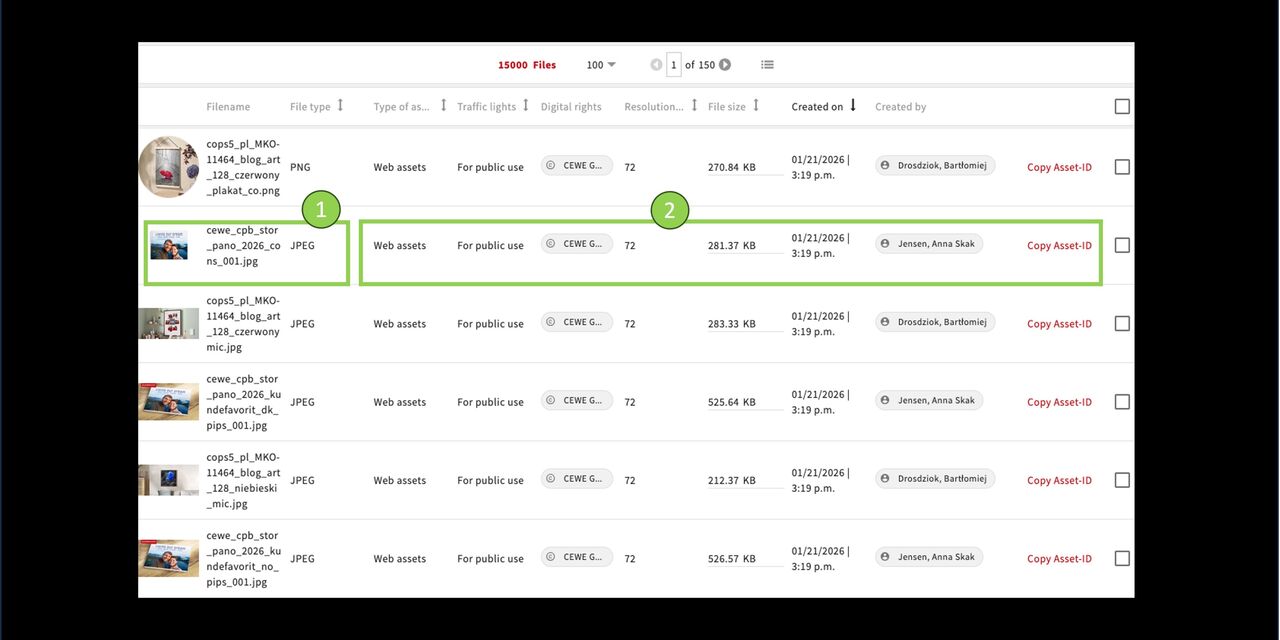
List
Also in the list view, the images can only be seen in a small size.
The focus is on additional detailed metadata.
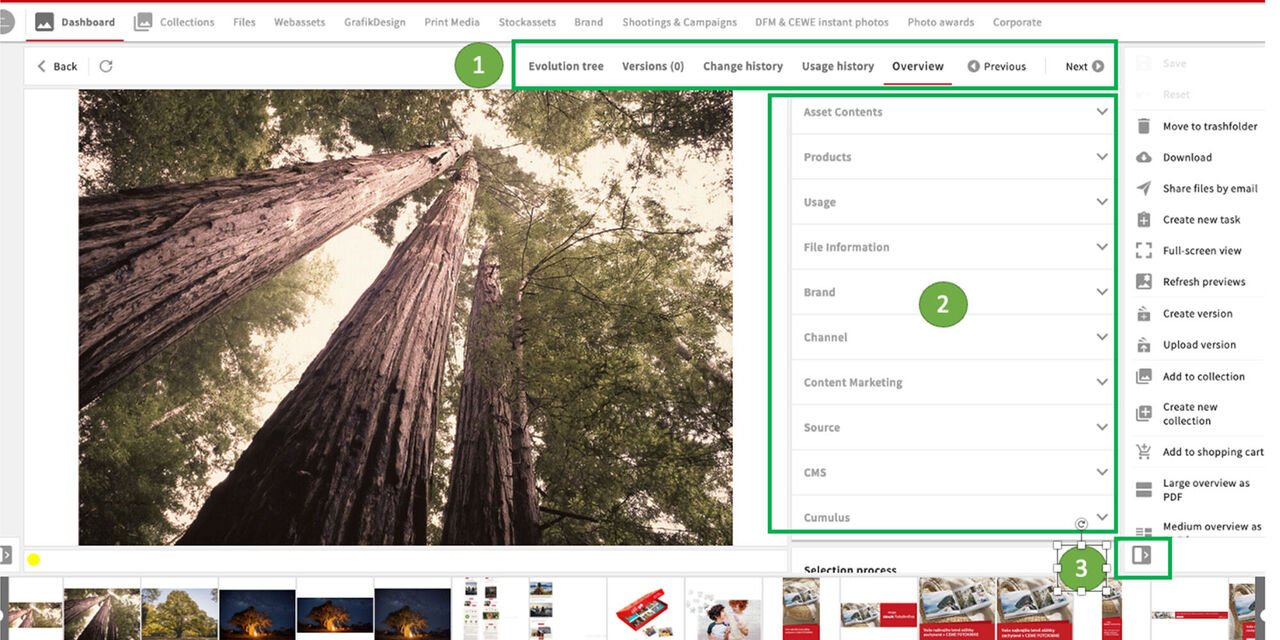
Detail view
A double-click on an asset opens the detail view, or click “View” in the action area.
- ere are the available options within the detail view.
- The metadata fields reflect most of the filters in the filter section. By filling in the metadata during upload, you can later search specifically for these details to find the assets.
- The action area can be shown or hidden as needed.
More information about metadata can be found in the “Metadata” section.
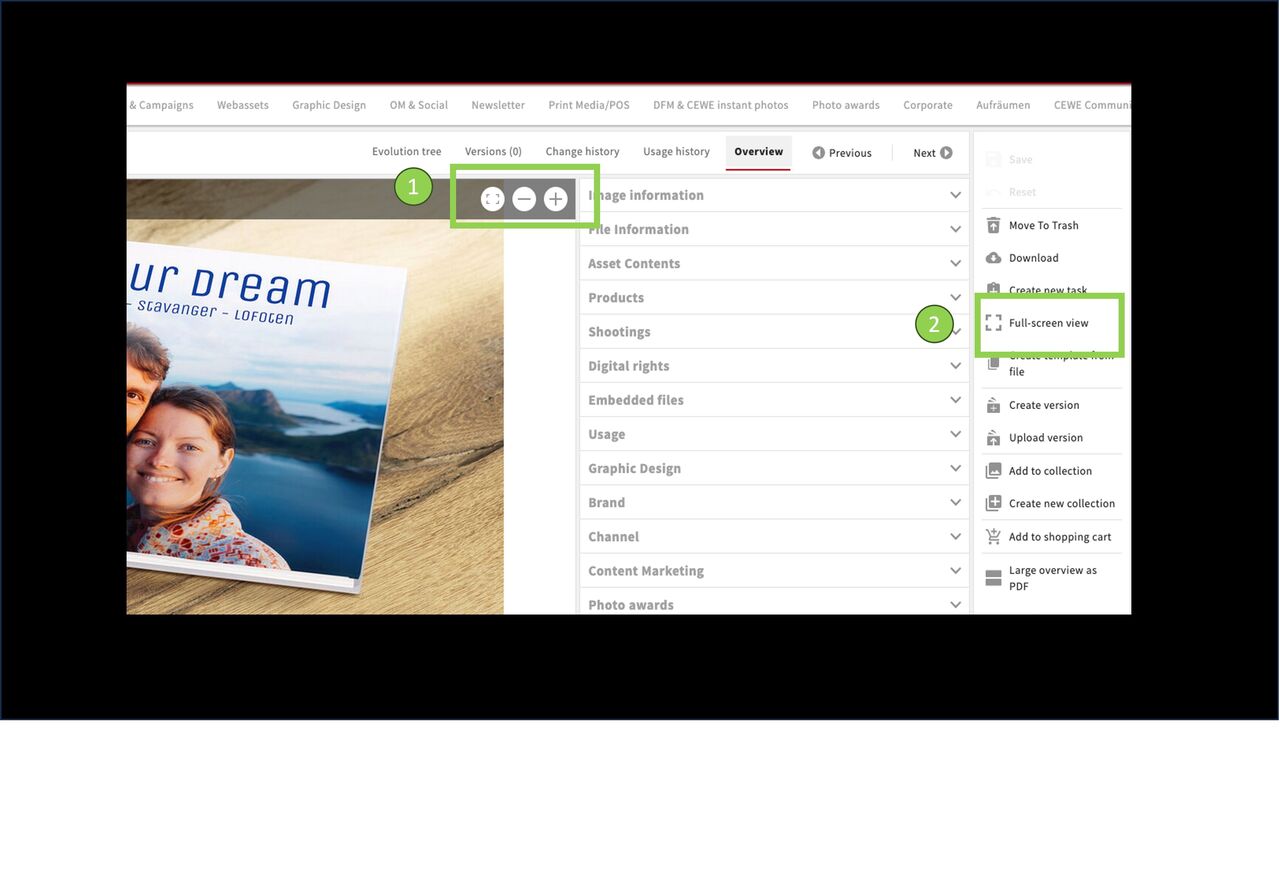
Full screen
From here, you can
- maximize and zoom the image
- as well as open the full-screen view.

Pin function
Here in the full-screen view, you can also pin an image to display another one right next to it.
You have the option to continue zooming.
You can use “Previous” and “Next” to view additional images in this mode.
Traffic light and other important statuses
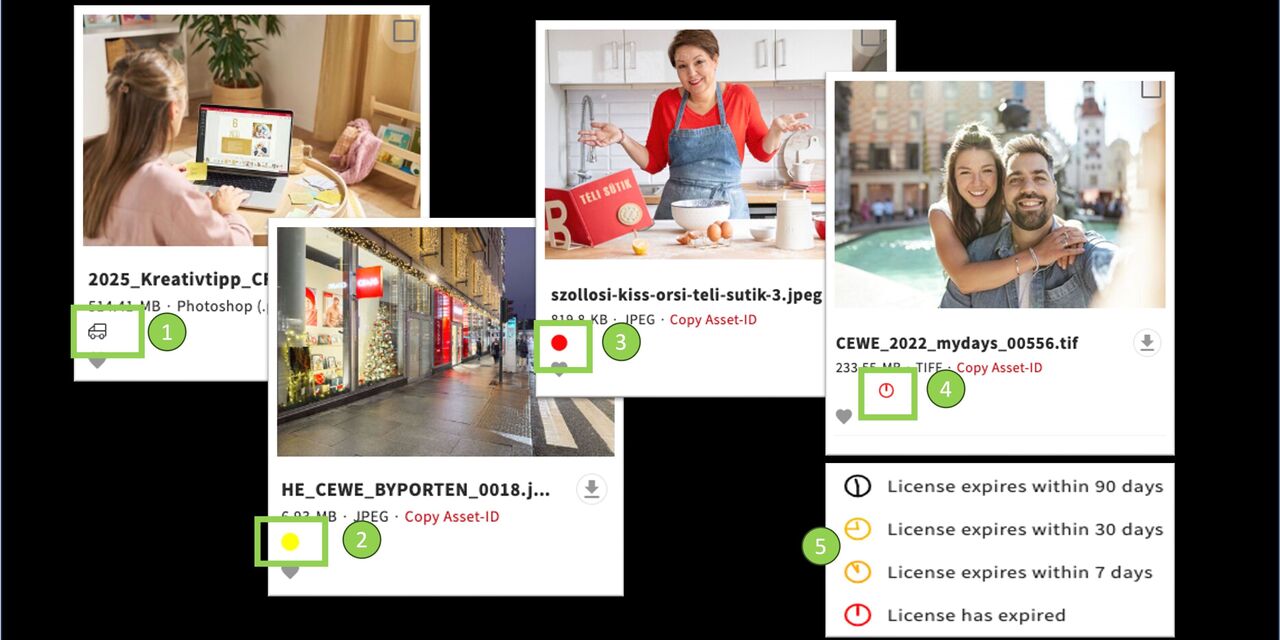
Meaning of the icons
- In delivery = The image has not yet been released for use.
- Yellow traffic light = Use may be restricted and must be confirmed.
Learn more about the download request - Red traffic light = The image is blocked for reasons and cannot be downloaded.
- License expired = Use of the image is limited in time. The license has expired.
- Additional icons for different time frames. Learn more about Expiring licenses.
Mark assets
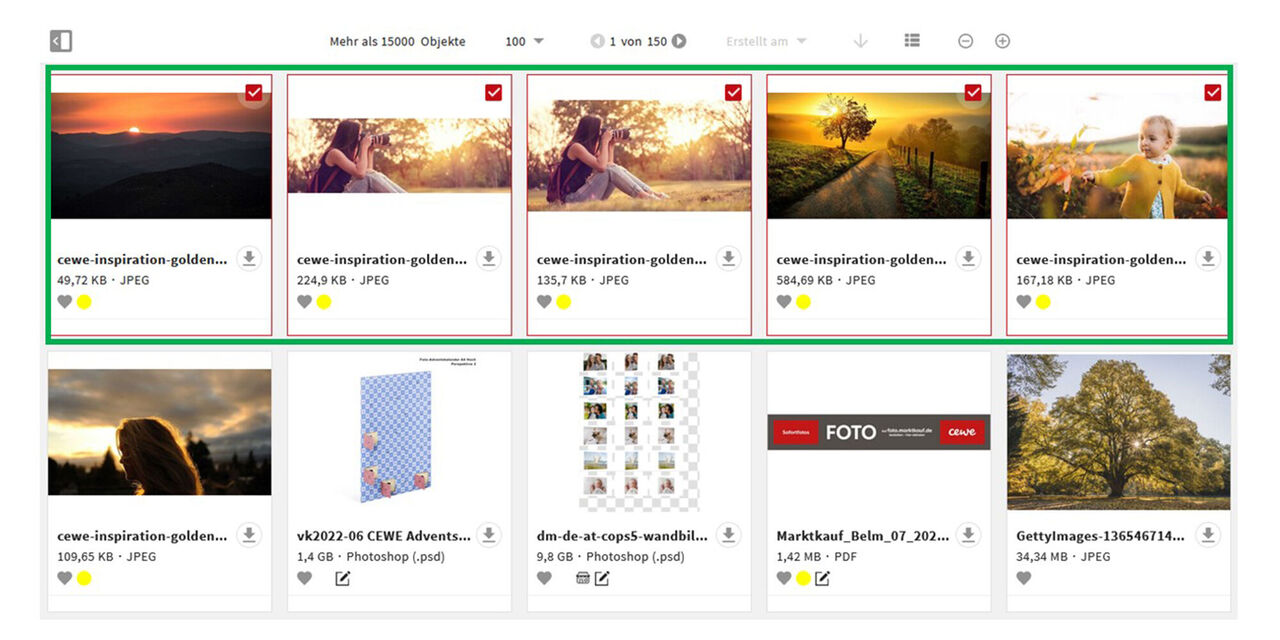
Mark assets in a row
Would you like to mark and select several assets in a row at the same time, as shown in the screenshot?
Click on the first desired asset as the starting point of your row
At the same time hold the Shift key
Click on the last desired asset
Now all assets between the start and end point are marked.
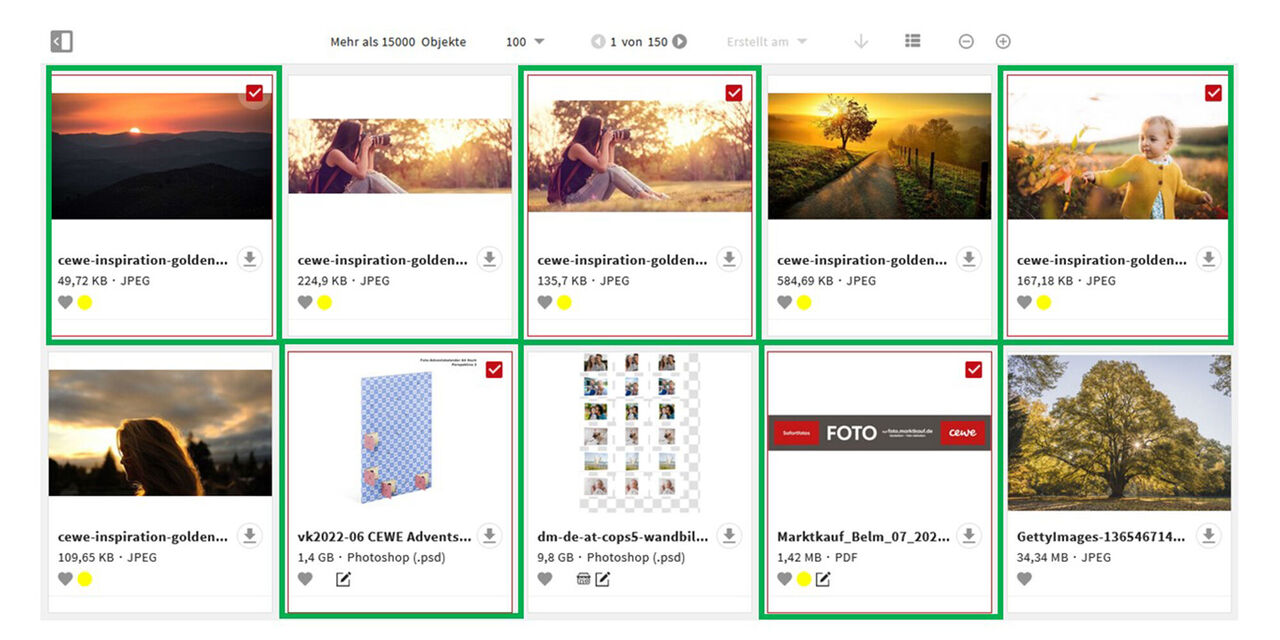
Mark various assets individually
To tag individual assets that are not in a row, do the following:
Press and hold the Ctrl/Cmd key
Click on the individual assets
The respective assets are then marked and can be used for further work.
Comparing versions / slider
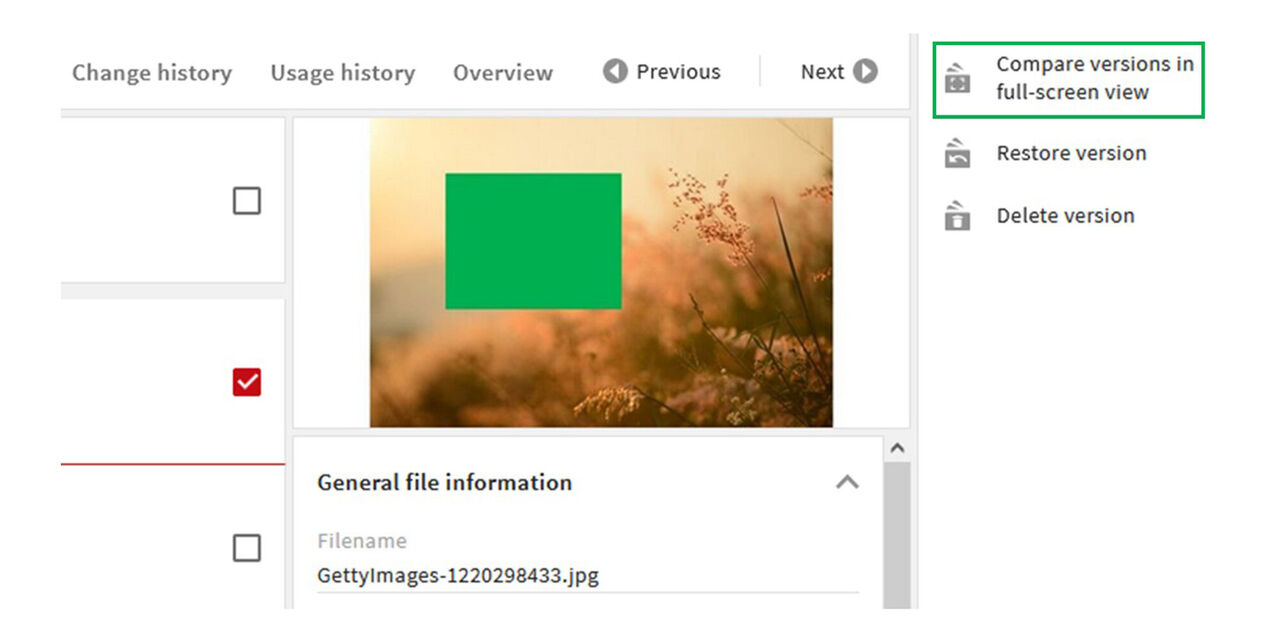
Compare Versions
If you want to compare two versions with each other, select the version and
- Click "Compare versions in full screen view"
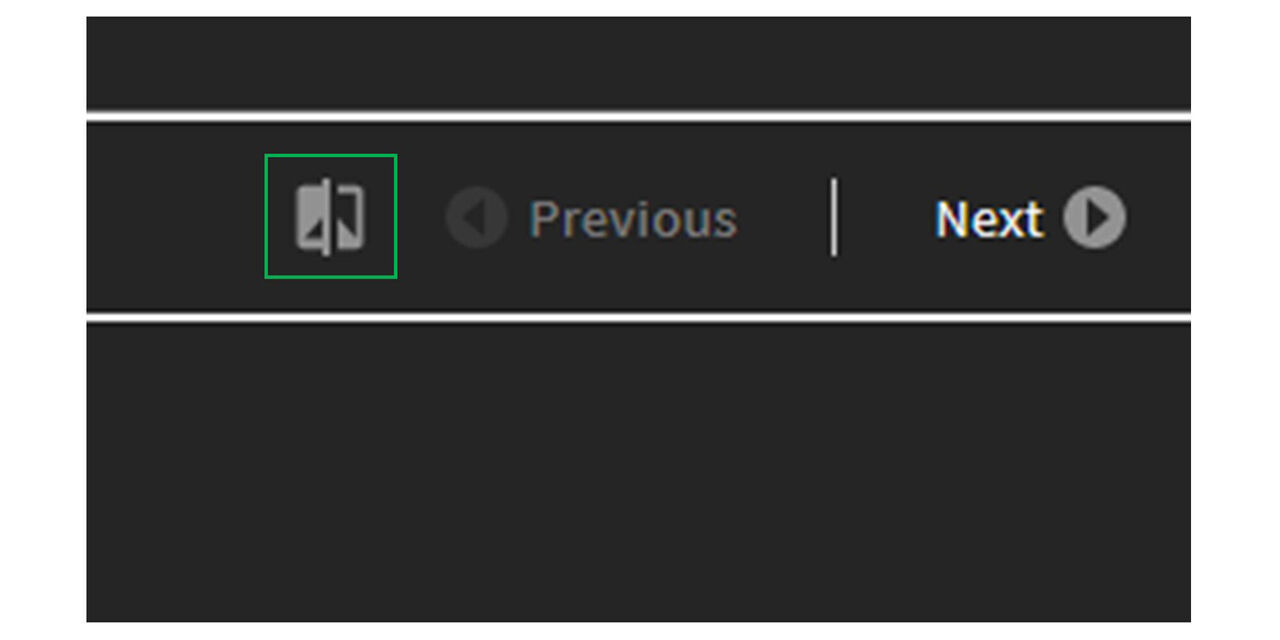
Icon
You can find the corresponding icon right next to the “Previous” button.
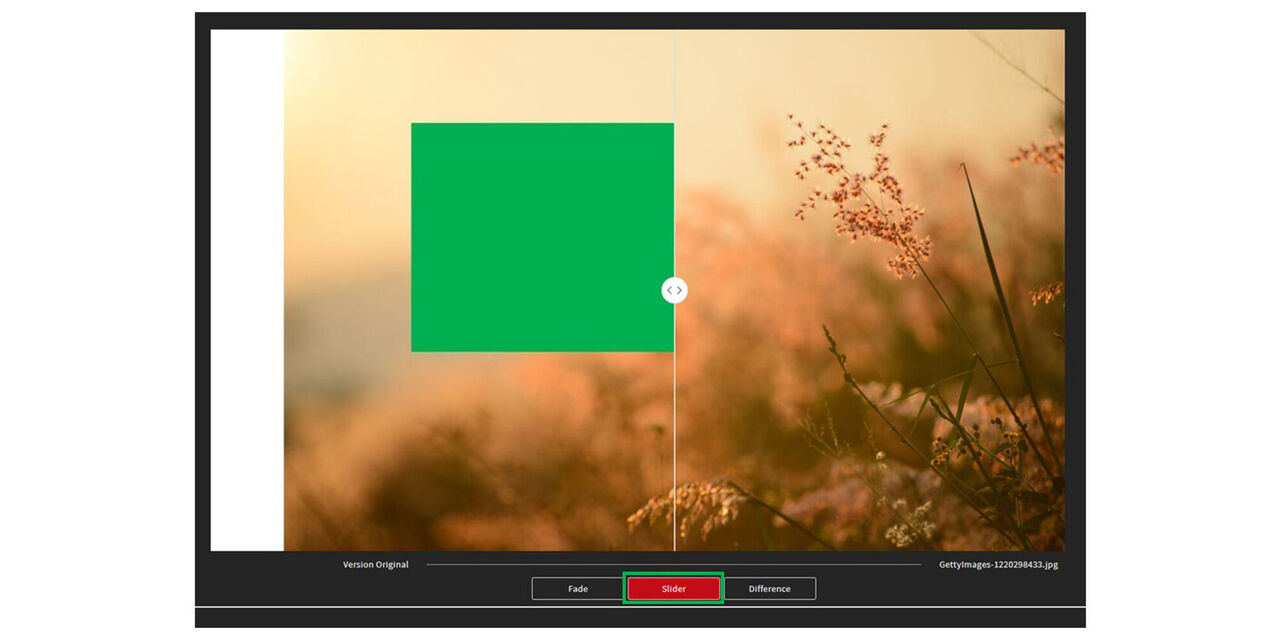
Slider
The slider view allows you to view two assets and move the image sections. This is the best way to compare the details.
Click on “Slider”.
Move the sections to the right or left.
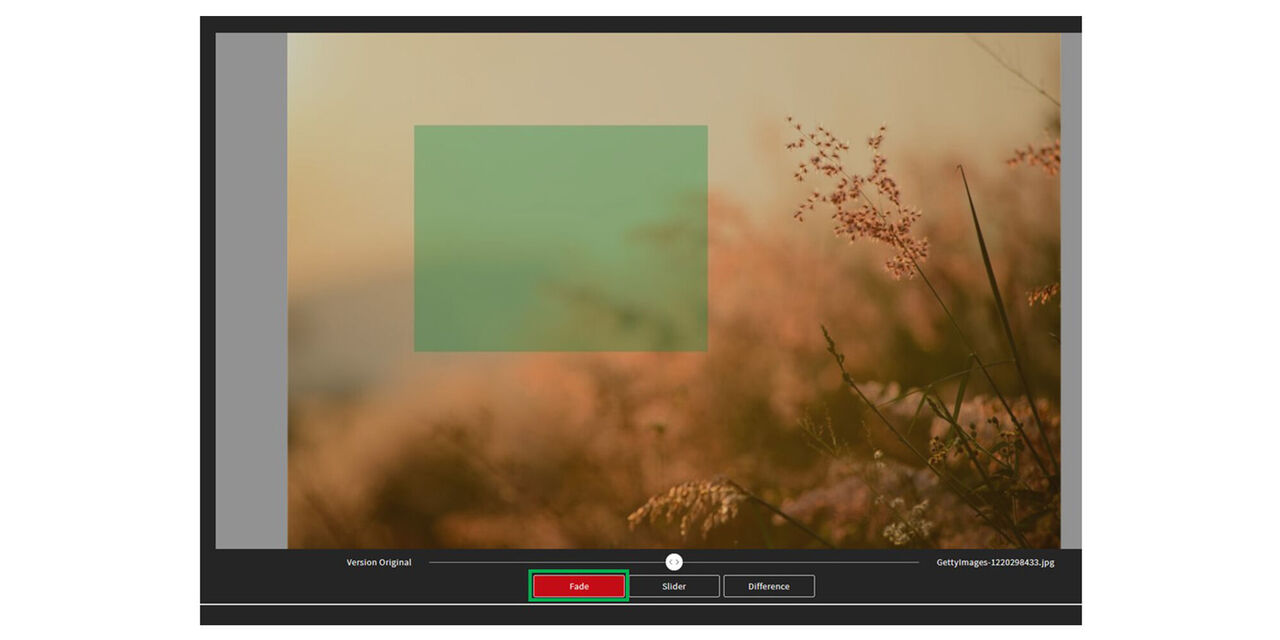
Crossfade
Alternatively, the two versions can be placed on top of each other so that the respective transparency can then be changed.
- To do this, click on “Fade”
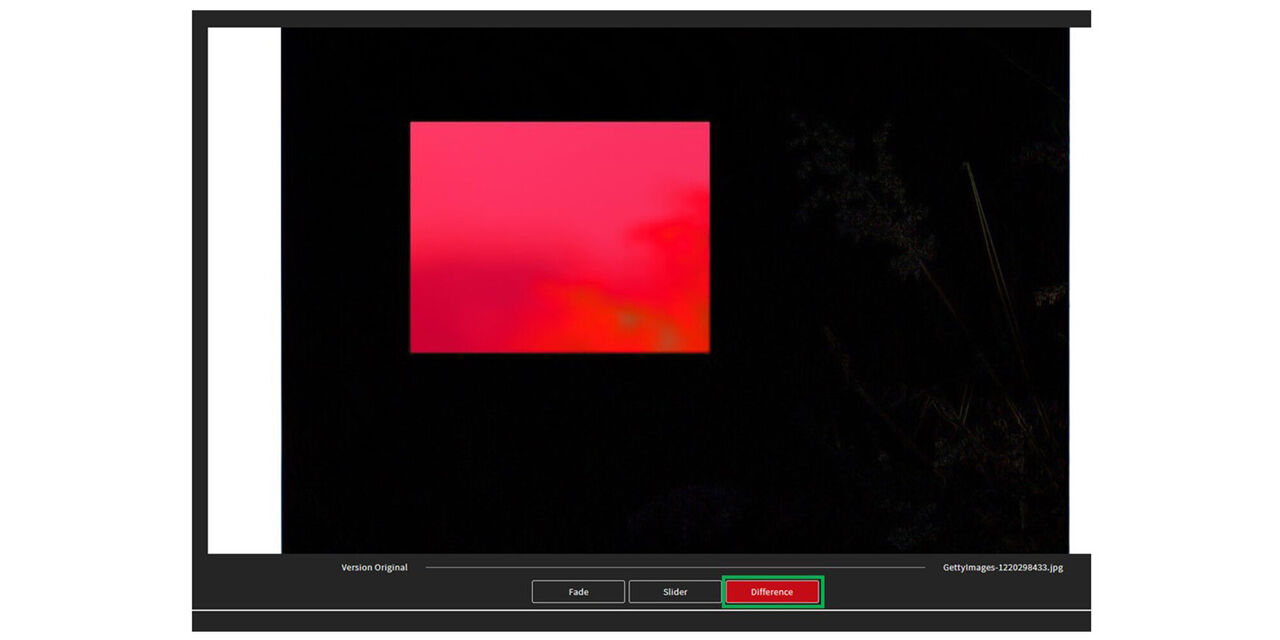
Difference
It is also possible to compare the assets based on a color difference.
- To do this, click on “Difference”.