Home > Help > Shooting delivery
Shooting / Delivery
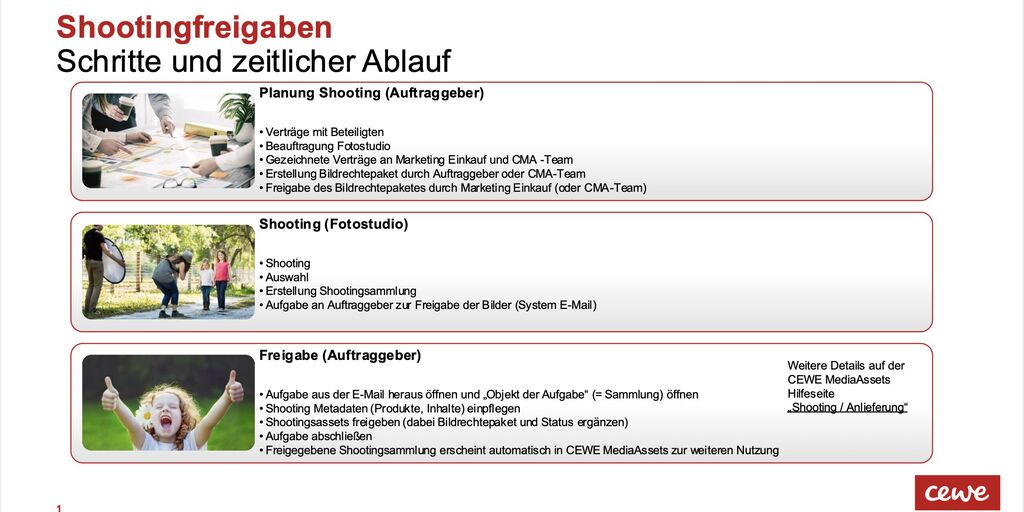
Shooting process - Delivery
With the new shooting process, collections and, if necessary, sub-collections for raw data, selection and final data are created.
The final collection is forwarded to the project owner, who adds the relevant metadata, releases the collection, which then appears immediately in our collection structure under Shootings & Campaigns.
This process ensures that new shooting material is quickly available in the right area and with the appropriate keywords.
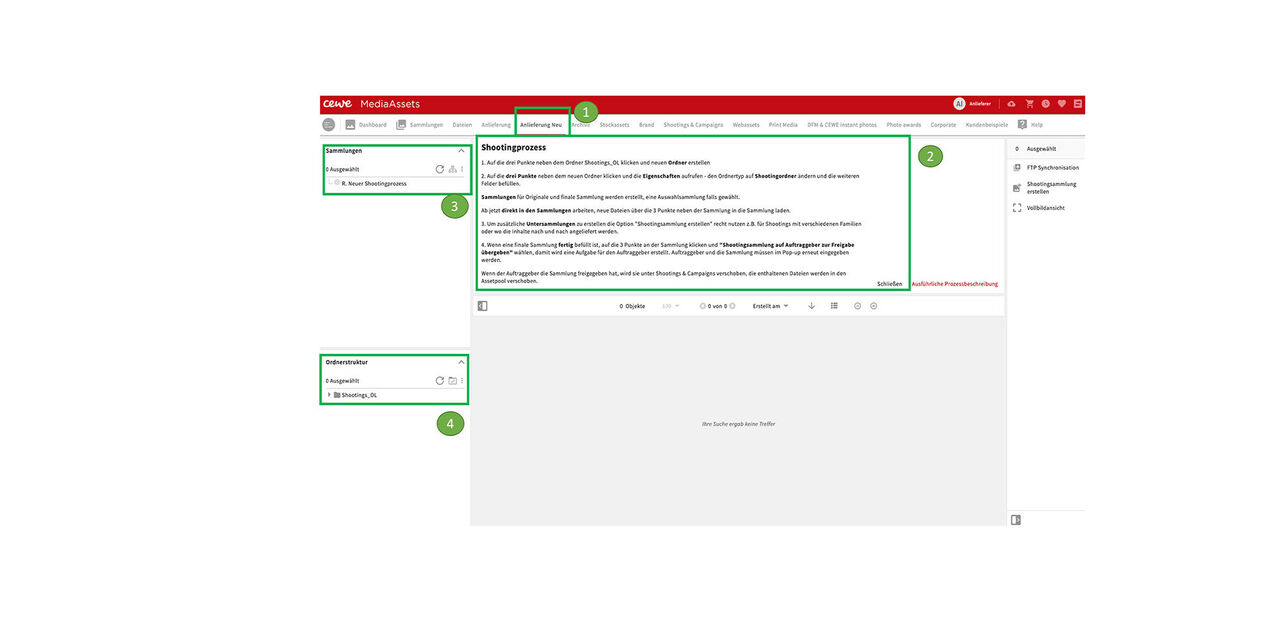
Delivery new
- Go to the Delivery new section.
- The next steps in the shooting process are briefly summarized here.
- There is a main collection as a parent of any new collection.
- And there is the main folder Shootings_OL.
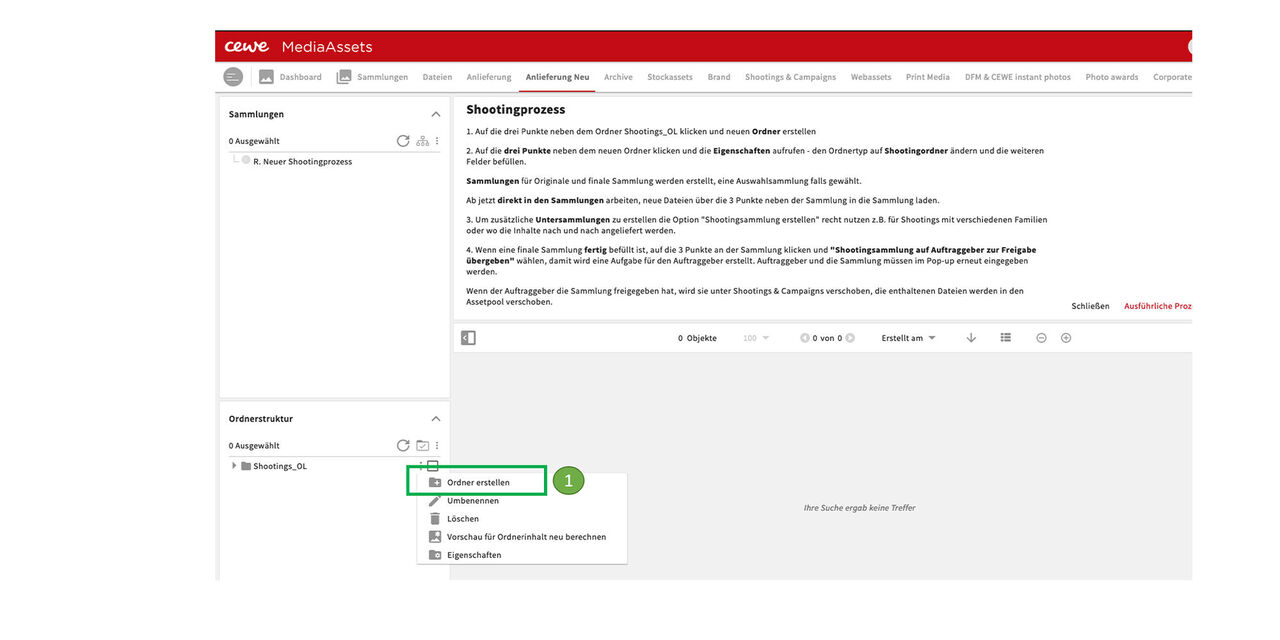
Create folder
As described in the above instruction, first of all a new folder for the shooting must be created.
The new folder appears in the list above the existing folders.
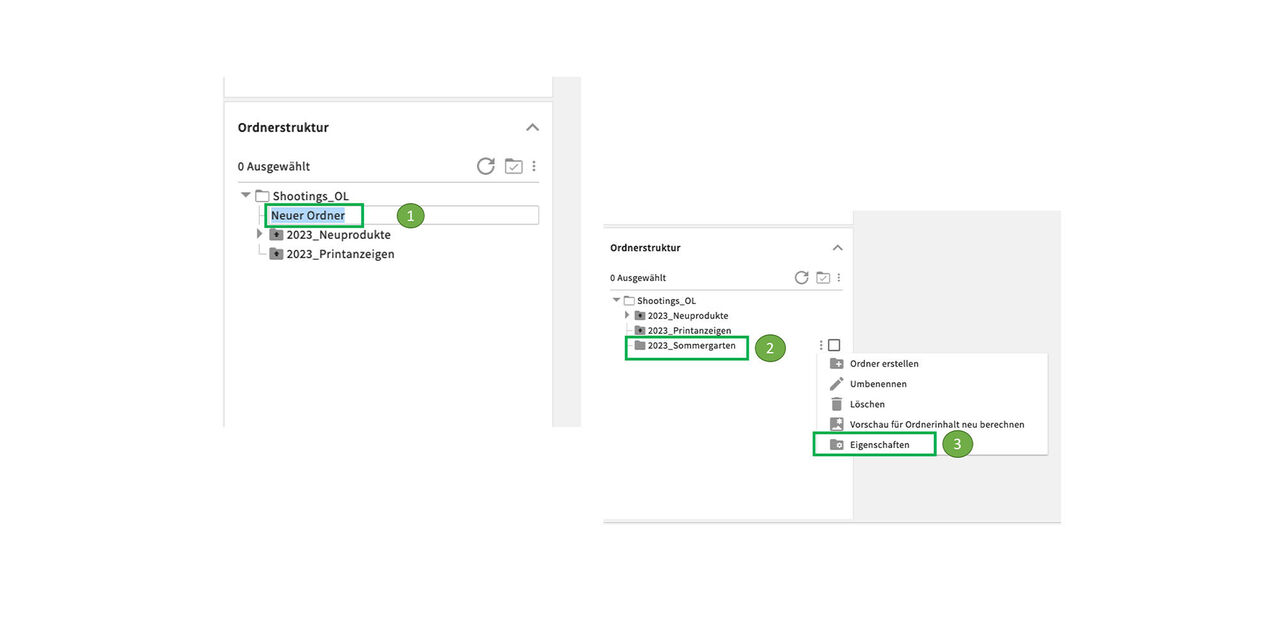
Now let's rename it.
- Then we call the properties by clicking on the 3 dots beneath the folder
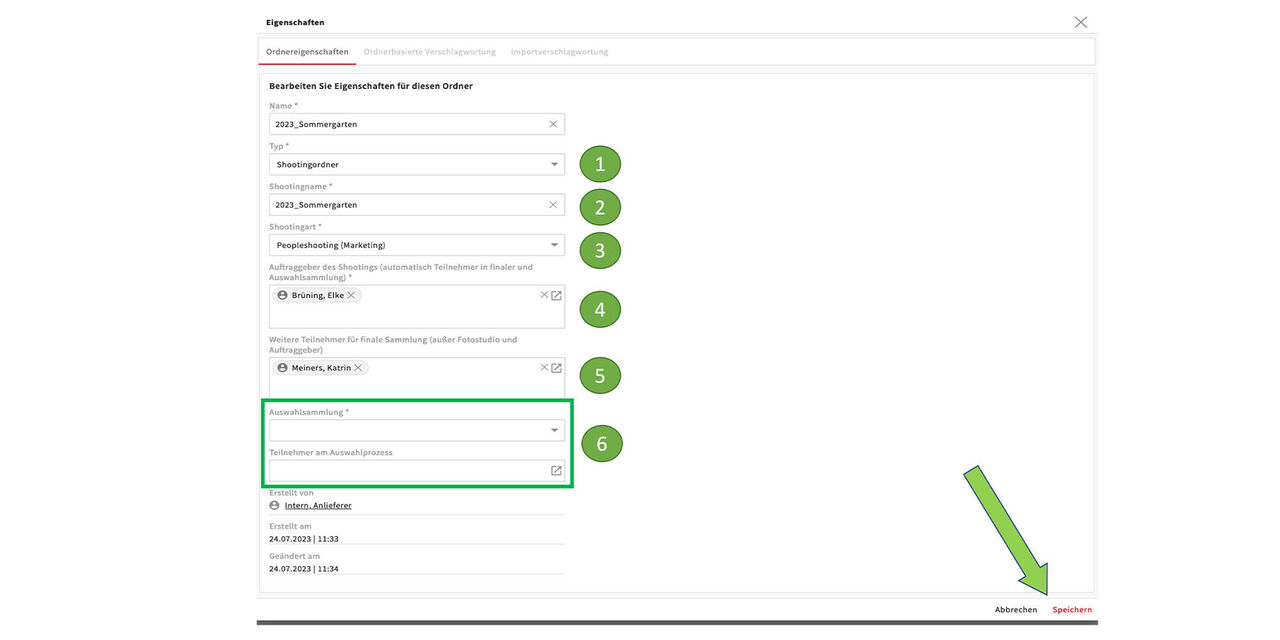
In the next step, the folder type is changed and additional information is entered:
- Change folder to Shooting Folder (choose from drop down).
- Enter shooting name.
- Enter shooting type (choose from the drop down).
- Enter project owner (open user list).
- Enter participants for the final collection (open user list)
- If necessary, a selection collection can also be created.
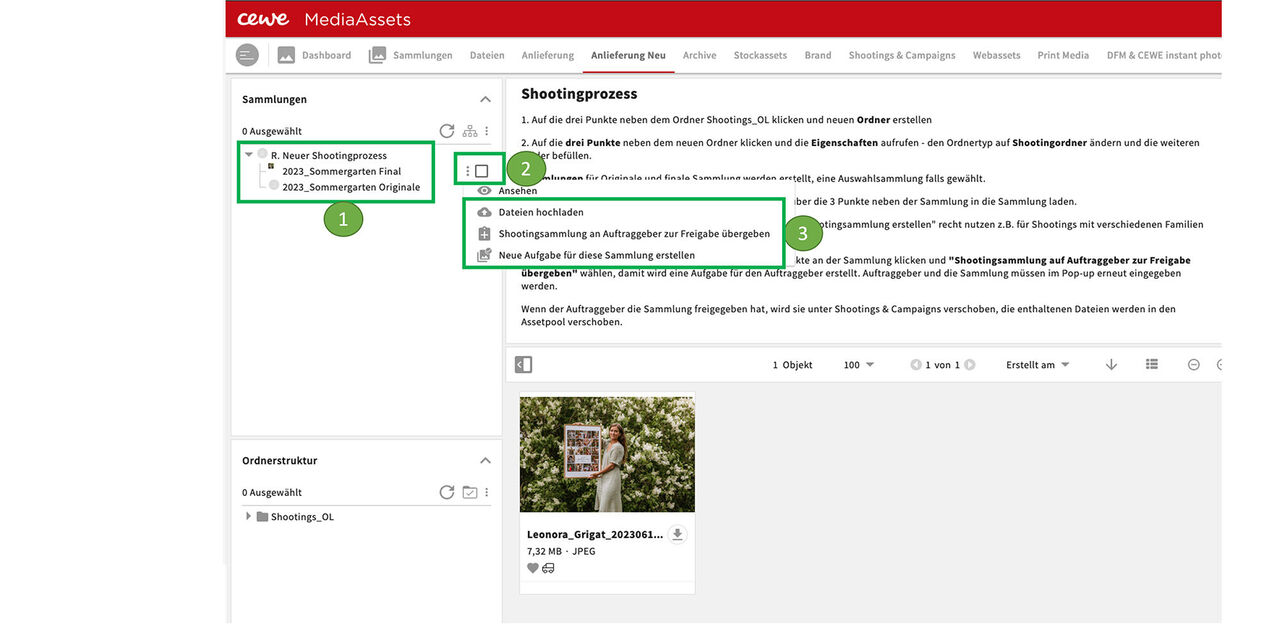
Collections created
- An Original collection and a Final collection have been created.
- The assets are **uploaded **directly here.
- Then we can create task for the Project owner to release
You can also add sub-collections if needed by using the "Create shooting collection" button on the right (not visible on this screenshot) This makes sense if images can only be released gradually or if other subdivisions are necessary, e.g. by families involved.
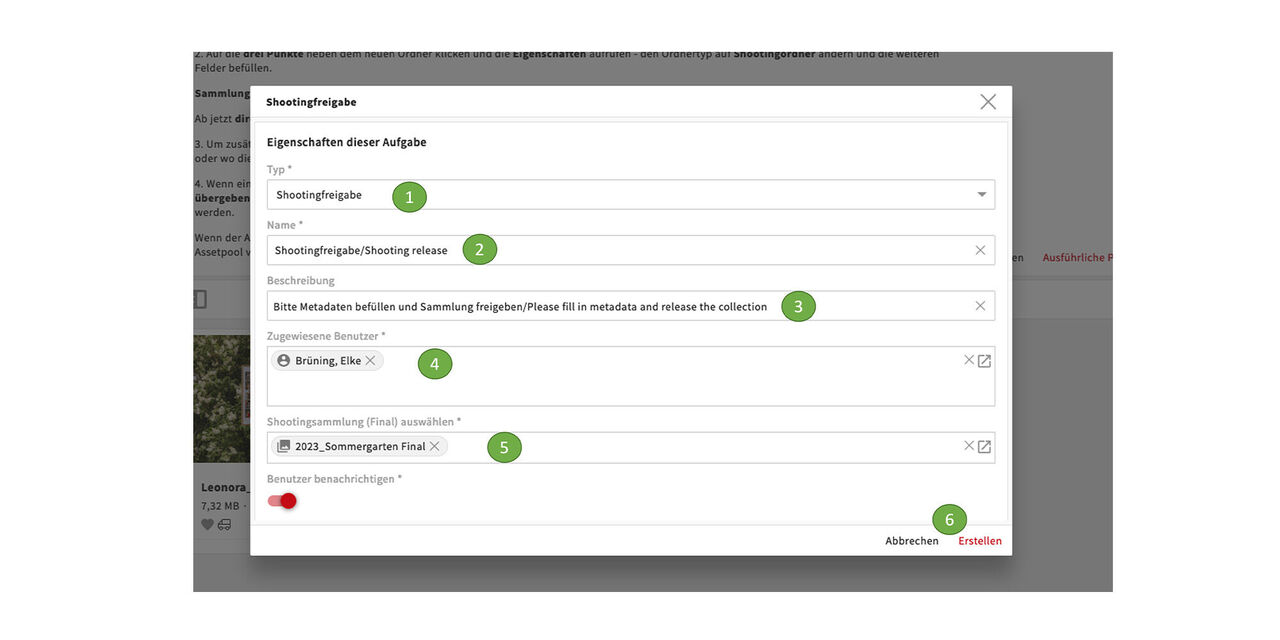
Shooting release
In this pop up we fill the details of the task for the project owner. The first 3 points are already preset:
- The task type is** Shooting release**.
- The name is the same.
- In the description, the Project owner is asked to add the metadata and then release the shooting.
- The assigned user is the project owner, he can be typed in here or selected from the list.
- Then add the name of the shooting collection.
- Then Create.
The project owner now receives an email with the task and takes the appropriate steps.
Shooting process - Release by project owner

The project owner of the shooting receives an email from the shooting team / photo studio with the task for further processing.
- The subject includes the task and the name of the shooting
- The task can be opened from the email
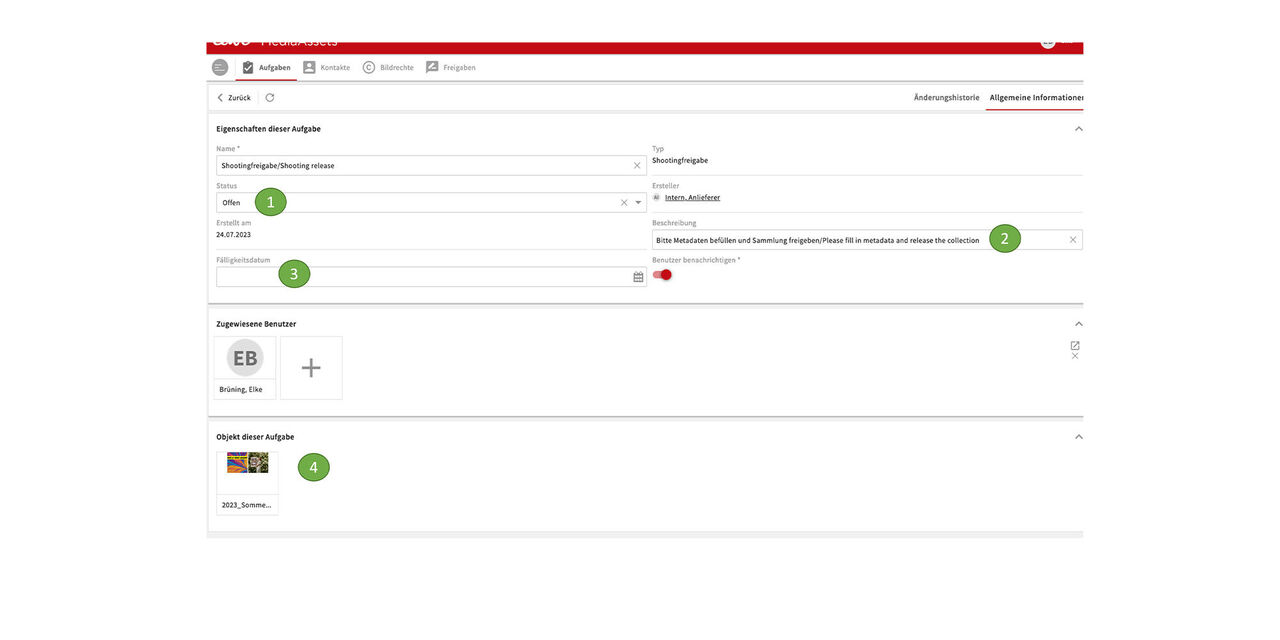
Task
Here are the details of the task:
- The status is open.
- The description says exactly what to do.
- A due date can be given. However, shootings should of course be approved immediately so that the images can be used.
- Go to the collection for editing via the object of the task.
Edit collection
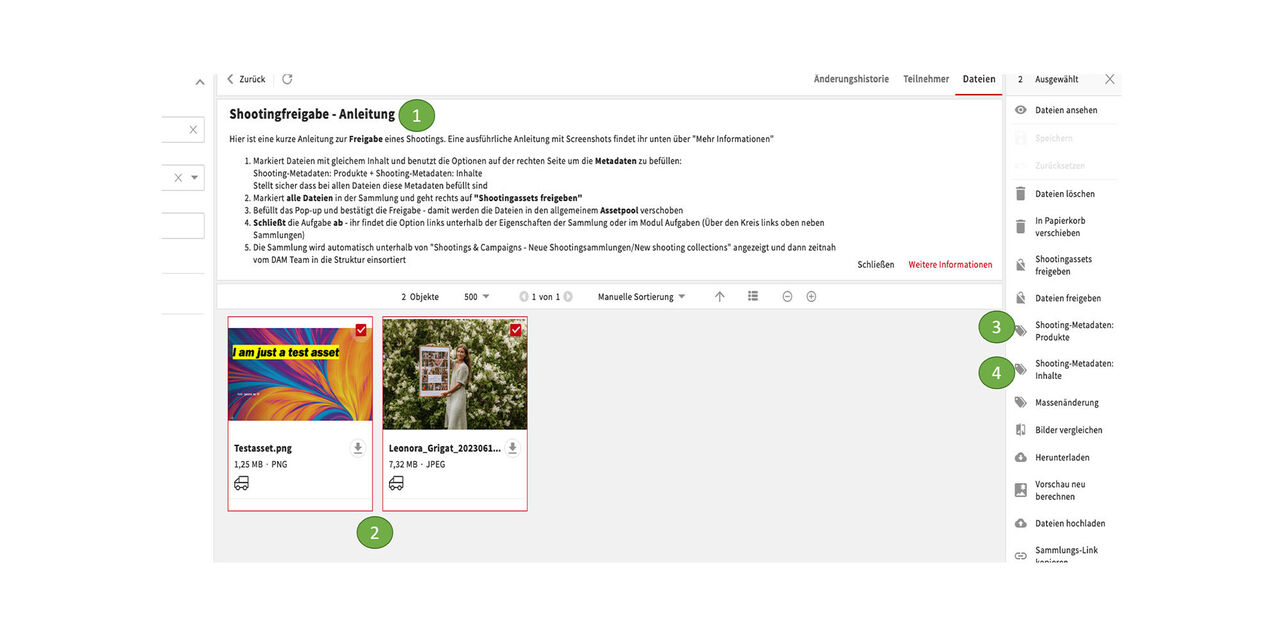
- Here is a quick guide on what to do.
- The next step is the tagging of the assets (can be done easily via action buttons on the right). Assets with the same content are marked.
- Shooting metadata Products
- Shooting metadata Content
Then continue with all other assets in the same way until all metadata are set.
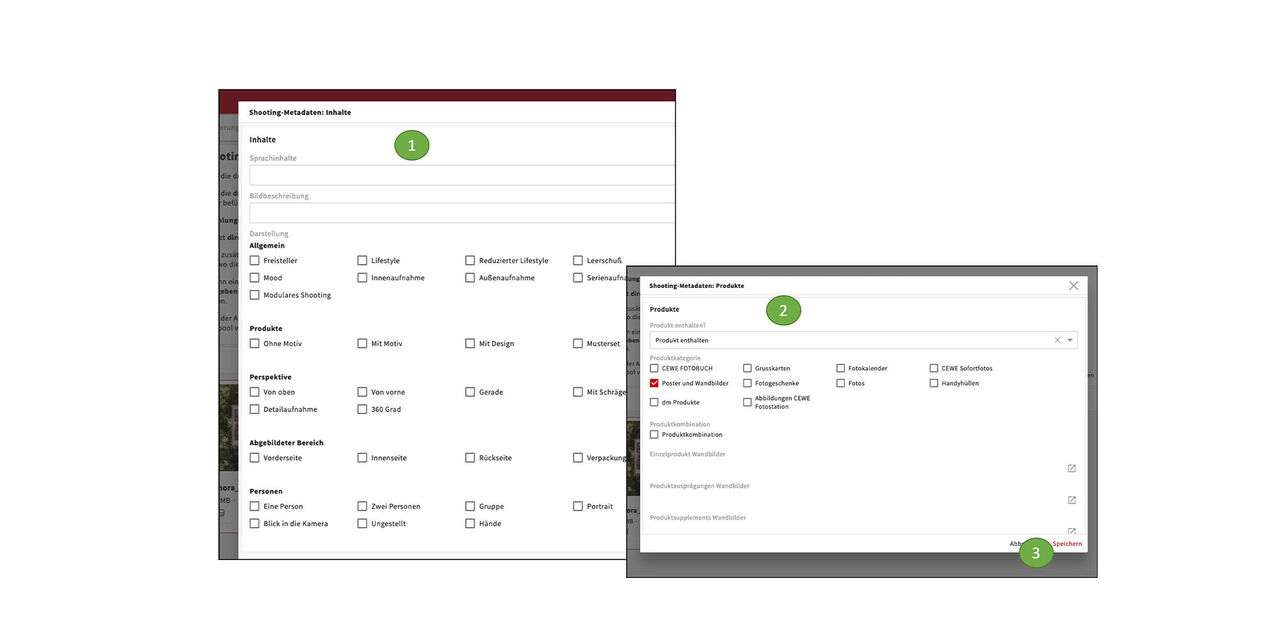
The mandatory metadata is clear and easy to fill in here:
- Content
- Products
- Don't forget to save :-)
This is of course the minimum of metadata that we need. Feel free to add more usefull data later on.
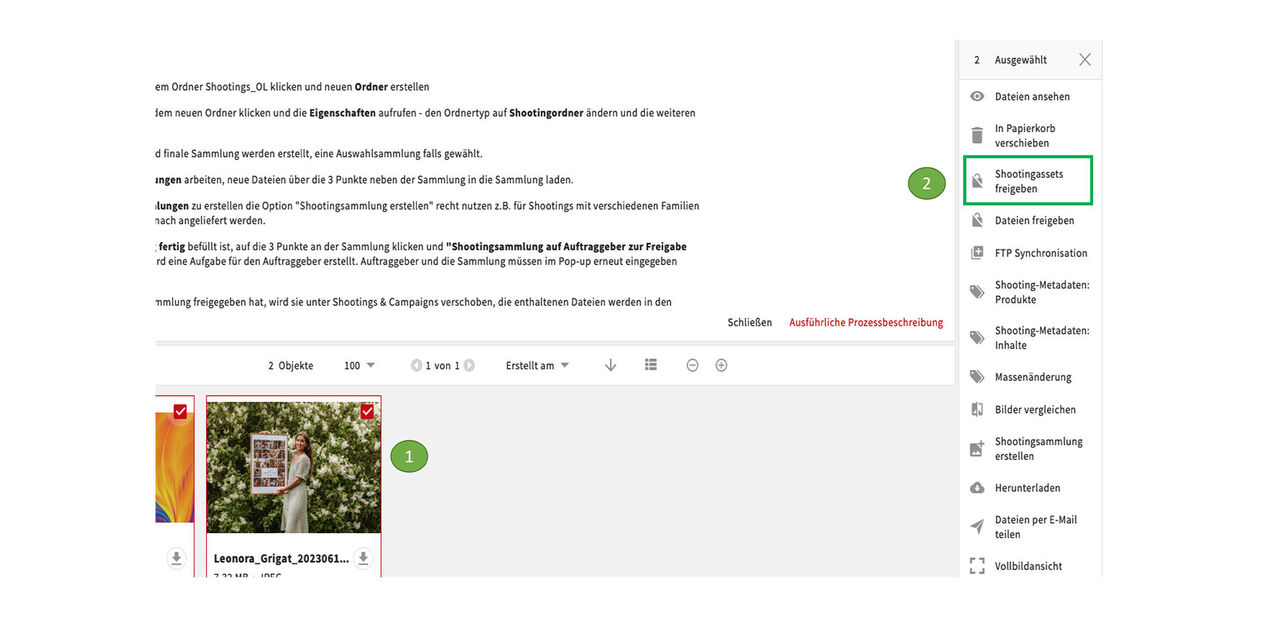
After all metadata have been entered
- mark all assets in the collections
- and Release Shootingassets
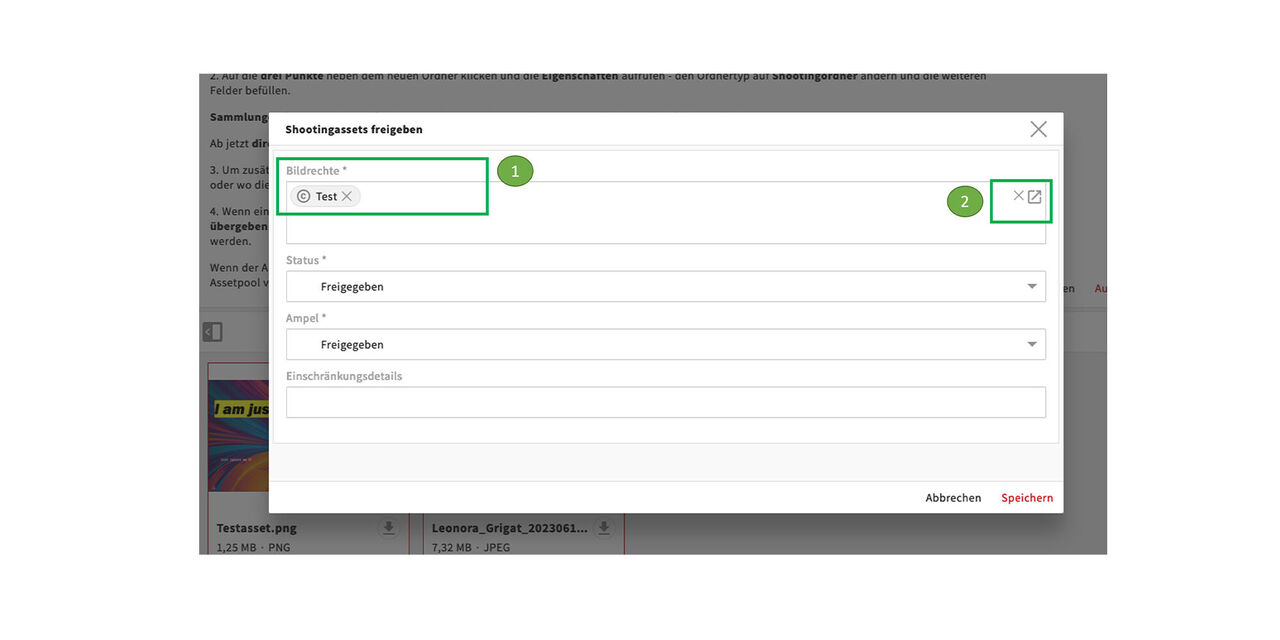
Digital rights
Now the Digital rights are attached.
- The corresponding Digital rights package can be written in the box
- or can be found using the search
Status and traffic light are set as usual. Restrictions are only entered for locked assets. All usage rights are included in the image rights package.
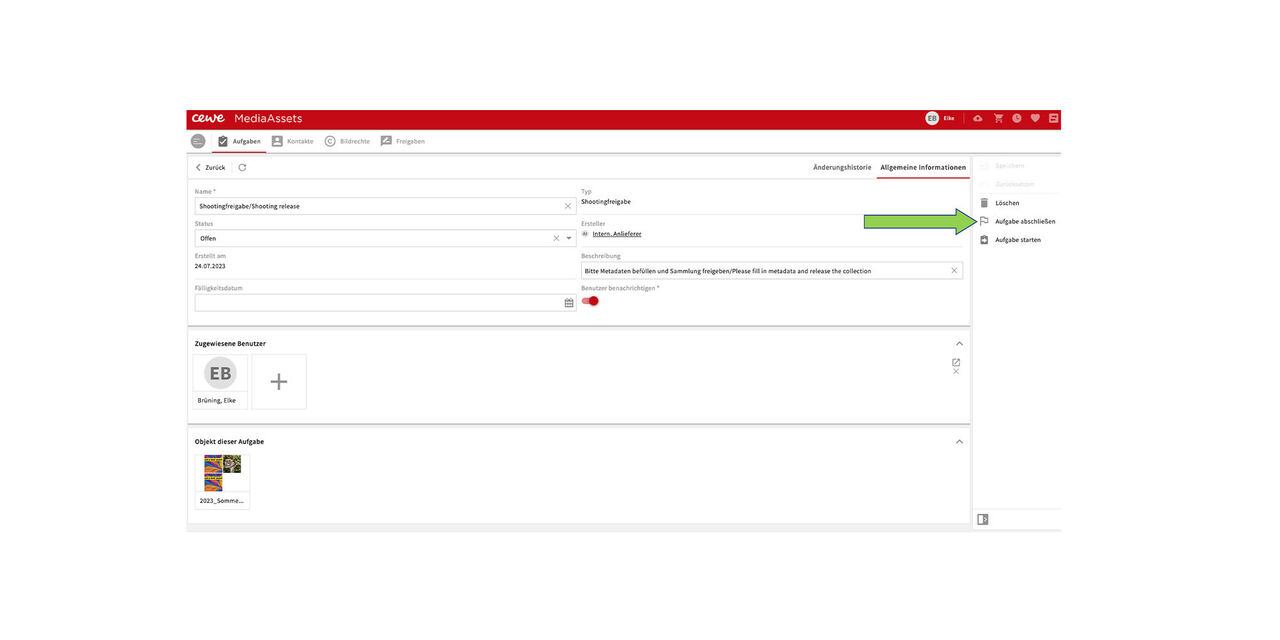
All done!
Now just complete the task.
This will finally release the assets and collection and move them to their place in the collection structure.
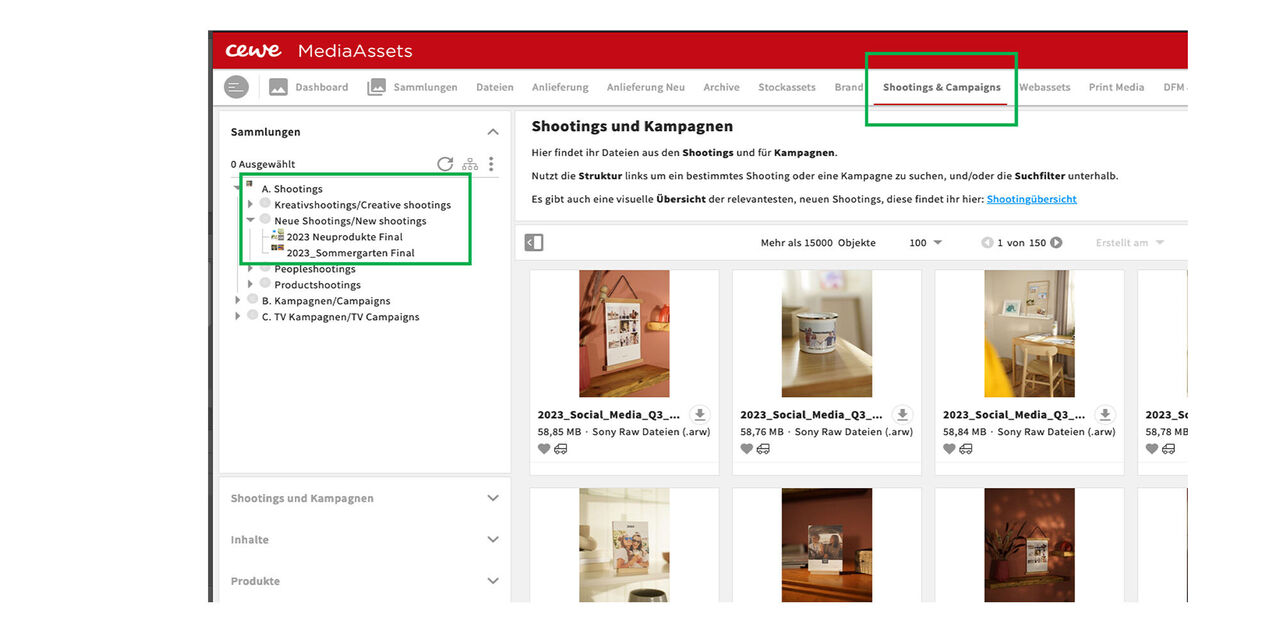
New shooting collection
If you now go to the area Shooting&Campaigns you will find released collection under the Neue Shootings / New shootings.
Shootings international sites
Process for the delivery of locally produced shooting material into CEWE MesiaAssets
Intro
We want to ensure that shooting material from the international sites can also be shared in CEWE MediaAssets.
For this purpose, there is the option to create shooting collections, which then appear in the right area and can be found by everyone there.
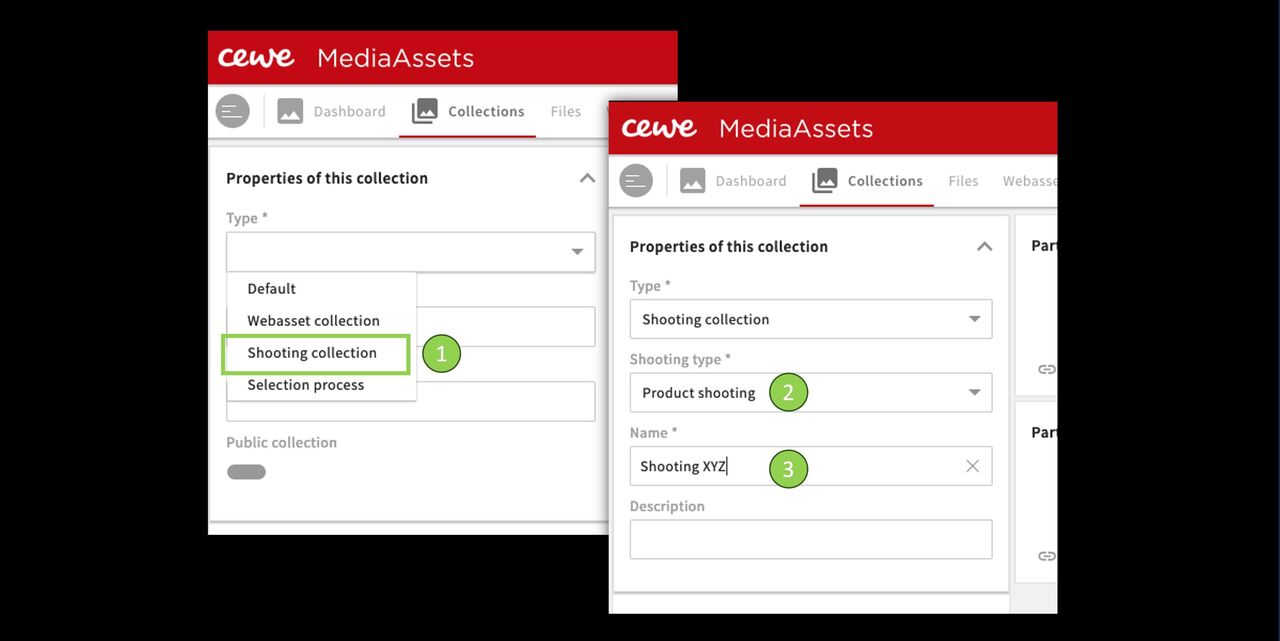
Create a collection
Go to the collections and click on Create collection in the top right-hand corner.
- Select the collection type Shooting collection.
- Select the shooting type, e.g. product shoot
- Enter a name. ( always additionally in English)
Then save.
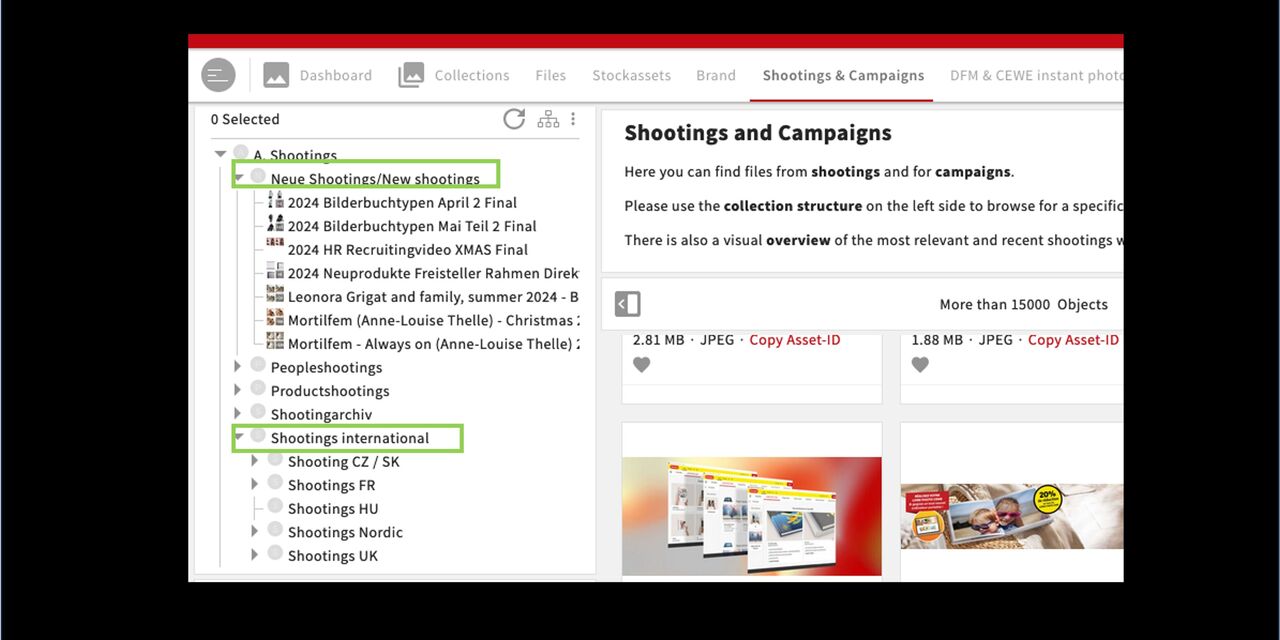
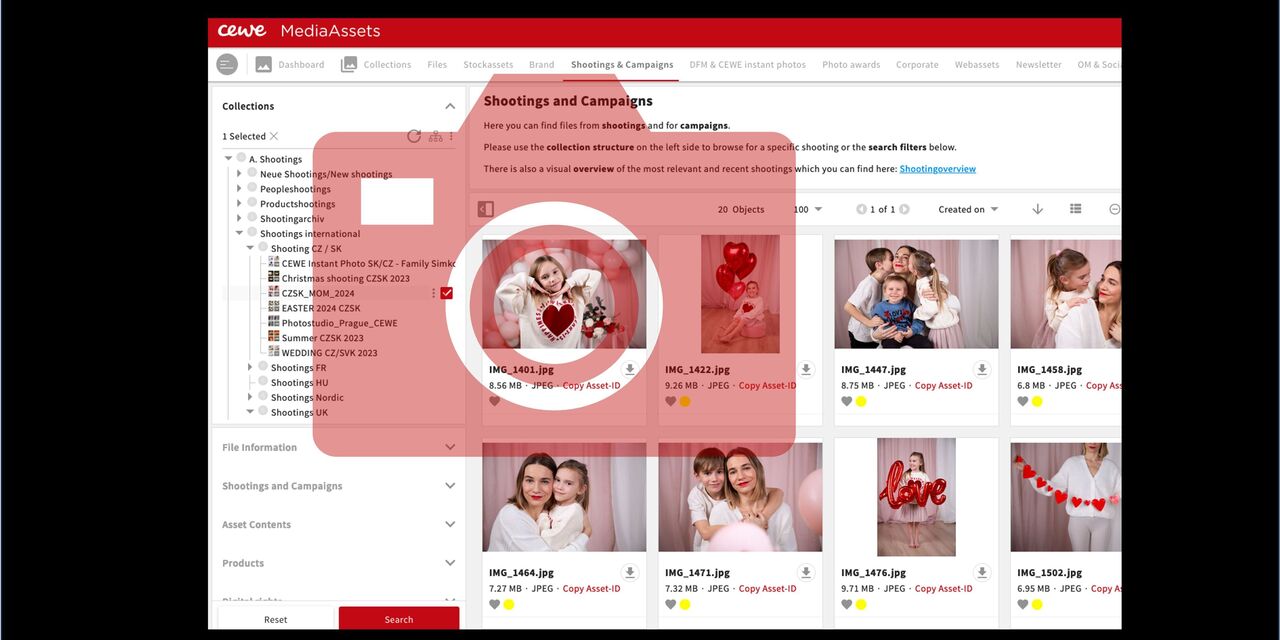
Collection in the Shootings & Campaigns section
The collection appears automatically under Shootings & Campaigns - New Shootings .
From there, we will put them into the existing structure, usually under Shootings international > country.
It is mandatory to upload the original files that are to be used for compositions and web assets and to provide them with the appropriate digital rights. This process facilitates this and at the same time makes the images findable for all colleagues.